Image Setup
From IFC Monitor screen go to File>Configuration>Image.
The image functionality processes the printable reservation information and delivers the in formation in the methods print, fax, and email. In this screen you can setup the various queues.
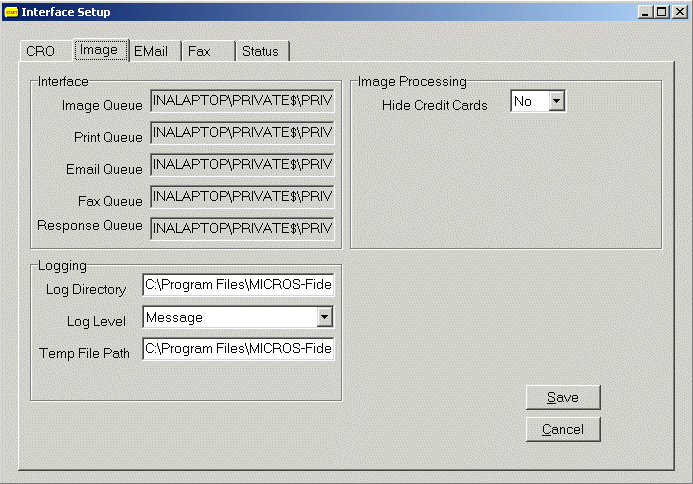
Example: Image setup tab.

All entries in this section are preset during the installation and are therefore read-only fields, as they don’t need to be changed again.
Image Queue. Enter the queue name used for images as <Name of the interface monitor machine followed> by \IMAGE.
Print Queue. Enter the MSMQ name used for print jobs as <Name of the interface monitor machine> followed by \PRINT.
Email Queue. Enter the email queue name as <Name of the interface monitor machine> followed by \EMAIL
Fax Queue. Enter the fax queue name as <Name of the interface monitor machine> followed by \FAX
Response Queue. Enter the name of the queue where the image processor will send a response to as <Name of the interface monitor machine> followed by \CRO. This queue is used if the image system is unable to generate a reservation slip for either of the secondary delivery methods. In this case ORS receives a warning message from this queue.
Log Directory. The desired log directory path of the Central Interface Log. This is preset during installation but can be changed if needed.
Log Level. Set the log type used in the log file.
Temp File Path. Select a directory for use of the delivery software for temporary file storage during transmission of fax, print, and email services.
Hide Credit Cards. You can determine whether credit card numbers shall be shown fully during data transmission.
See Also