Welcome Offer Alerts
To set up Welcome Offer Alert messages and conditions, select Configuration > Reservations > Codes > Alert Definition > Welcome Offer. The Welcome Offer Alert Configuration screen displays.
Description. A description of the message to be displayed by default upon Check In if the reservation satisfies the defined alert conditions.
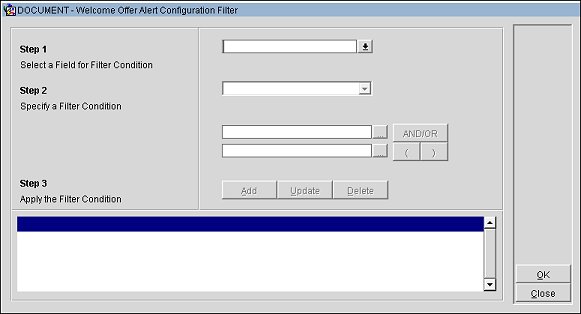
Conditions. Set up conditions that need to be satisfied for the Welcome Offer Alert to display. The Welcome Offer Alert will be displayed. A user can create only one Welcome Offer Alert. Select the ellipsis button. The Welcome Offer Alert Configuration Filter screen displays:

Select a Field for Filter Condition. Select a field for the filter condition.
Specify a Filter Condition. Specify a filter condition.
Apply the Filter Condition. Click the Add button to add the filter.
When finished, click OK. The completed Welcome Offer Alert Configuration screen displays. Click OK. A User Activity Log will be created when the configuration is modified.
Select Front Desk > Arrivals, select a Due In reservation, and then continue to check in the reservation. During the check in process, if the reservation is eligible for the Welcome Offer Alert based on the reservation’s attributes, OPERA will prompt to select the welcome offer.
If a reservation has several alerts attached, the Welcome Offer Alert displays last in the sequence, as the OPERA user must proceed to other screens in order to complete the guest’s selection for the welcome offer.
Select a single value from the Welcome Offers LOV: Items or Post It. This depends on what values are selected in the FRONT DESK > WELCOME OFFER OPTIONS application setting. When finished, select OK.
If nothing is selected and the Close or OK button is clicked, the Bypass check box will be checked automatically and the alert status will be Bypassed. A User Activity Log will be created when the user selects this check box.
If a value is selected and the Close button is clicked, this message displays: "Do you want to save the changes?" Selecting Yes displays the relevant screen to finish the welcome offer procedure. Selecting No closes the screen and the alert status will be changed to Bypassed. A User Activity Log will be created when the status of the Welcome Offer Alert is updated by OPERA based on user actions.
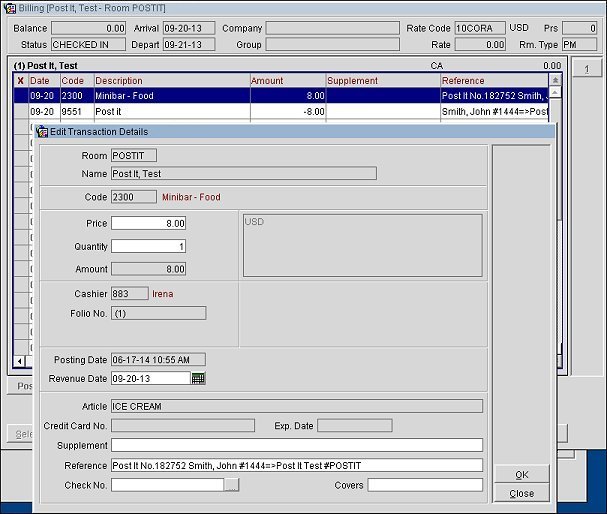
If Post It is selected, the Post It screen displays where any appropriate article can be selected and posted. Select the Method of Payment specified in the FRONT DESK > Welcome Offer Payment Method application setting. All the postings will be transferred to the Welcome Offer Pseudo Room and the alert status will be changed to Redeemed. The PM room specified in the FRONT DESK > WELCOME OFFER PSEUDO ROOM application setting must be checked in. If this PM room is not checked in, OPERA will display the message: “Welcome Offer Pseudo Room is not checked in.” This PM room must be Checked Out manually like any other regular reservation. Here is how the PM room will display the Post It transactions, the debit transaction for the article selected and the offsetting payment transaction, the balance on the PM room should remain 0.00 normally unless any other activity is performed manually by the user affecting this PM room:

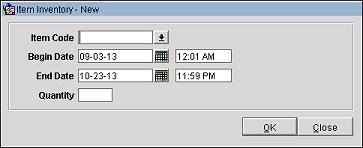
If Items is selected, the Item Inventory screen will open and a new item can be attached to the reservation. The RESERVATION screen will display the selected item in the item inventory field:

The item attached to the reservation can be seen on the Item Inventory screen, and the alert status changes to Redeemed.
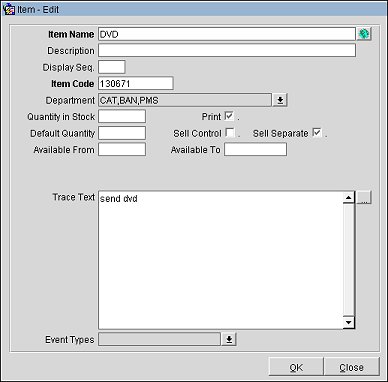
This will automatically create trace for the appropriate department. Traces for respective departments must already be created and associated with the items. A group of items that can be provided as a welcome offer must be predefined in the Item Inventory configuration accessed from Configuration > Reservations > Item Inventory menu item:

1. If Post It or Items is selected but no specific article or inventory item is chosen, after the user closes the corresponding screen and then clicks the OK button, the Status lamp on the Alerts screen will have a value of Pending. The Redeem button will also display on the Alerts screen for any Welcome Offer Alert that has not been decided upon. The user can later access this alert via Reservation > Options. After the user clicks the Redeem button, based on the value in the Welcome Offers field (this is the same value selected initially at Check In), OPERA will continue with either the Post It article posting or Item Inventory screens (i.e., the same process that occurs normally at Check In).
2. If Post It is selected by the guest but no specific article is chosen, the user can initiate the welcome offer redemption process directly from the Post It screen from Cashiering > Post It, post the article. Select the payment method specified in the FRONT DESK > Welcome Offer Payment Method application setting. The Post It screen displays the guest search area in the left upper corner of the screen. Enter the name / room number of the guest who is redeeming the article. Highlight the reservation record and click the Select Guest button.
3. If the guest does not want to make any selection at the time of Check In, the user must select the Bypass check box; any value already selected in the Welcome Offers field will be removed. The status lamp will be set to Bypassed. Select OK to save the alert and close the Welcome Offer Alert screen. OPERA will not display the Welcome Offer Alert again any time during the stay if it was Bypassed or not redeemed at Check In. The user will have to manually access the Reservation Options > Alerts. In this scenario it is possible that the guest may end up never actually selecting a welcome offer either because it was Bypassed or not Redeemed at a later time.
4. After the welcome offer is selected or Bypassed by the guest, an alert will be added to the Alerts screen accessed from Reservation Options > Alerts to enable editing the selected welcome offer associated with the reservation and that may have not yet been redeemed/selected.
5. If the welcome offer is selected at the time of Check In, one of the following will take place: a Post It article posted or an item attached to the reservation. If the user does not have the POST IT permission and this option is selected for the welcome offer, when the user clicks OK, OPERA will show a message that the user does not have sufficient privileges to perform that operation. Once the OK button on the message is clicked, OPERA will internally mark the welcome offer as Bypassed and proceed with the Check In. The user will receive the message “Guest checked in successfully”. If the user wants to redeem the offer, another user with relevant permissions will have to use F8 and relogin, open the required reservation, and use the Alerts lamp to access the Alerts screen and redeem the offer.
6. If the guest wants to modify the welcome offer previously selected and redeemed (i.e., has the Redeemed status), the user can update the Welcome Offers field. A User Activity Log will be created when the user modifies the previously selected welcome offer. Select the reservation > Options > Alerts > Edit the Welcome Offer Alert > Edit the Welcome Offers LOV, and make the necessary change to the previously selected value. One of the following will occur upon selecting OK on the Welcome Offer Alert screen, depending on the previous value and the newly selected value.
7. If the guest wants to update the welcome offer selection with a status of Pending or Bypassed, the user can update the Welcome Offers field. Select the reservation > Options > Alerts > Edit the Welcome Offer Alert.
8. For a cancellation of the successfully checked in reservation with a welcome offer alert, OPERA will simply remove Item Inventory and Trace associated with it without any prompt. For a Post It, the user must make a manual adjustment to the PM room if required.
9. If the same reservation checks in again, OPERA will again initiate the entire Welcome Offer Alert Display process as described above.
See Also