Locator
The Locators screen is used to inform hotel personnel, particularly Front Desk staff and telephone operators, of the guest's on-premises location if the guest wants to be contacted for phone calls or other reasons while away from their room. A locator can even be placed on a guest who has checked out, but only for the check-out date of the guest. This feature can, for example, be used when guests request that their phone calls be temporarily transferred to an alternate location, such as the spa or dining room. (Locator functionality is available when the Front Desk>Locators application parameter is set to Y.)
When you create a locator for a guest, the Locator lamp displays in the lower part of the guest's Reservation screen Main tab and other various screens including the Reservation Search screen, Billing screen, and Telephone Operator screen (See Indicator Lamps for complete list and details.)
To add, change, or review a guest's locators, select the Locator option from the Reservation Options menu or from the Operator screen. (The Reservation Options menu is accessible from the Reservation screen or from the Reservation Search screen . Press [CTRL+F7] to access the Operator screen.) The Locators screen appears.
Note: The Locators screen only displays after selecting the Locator option when there are existing locators attached to a guest's reservation. Otherwise, the Locators - New screen displays. See Adding or Changing a Locator for more information, below.
The following fields appear on this screen:
Name. Last name of the guest.
Room No. Number of the room the guest is staying in.
Arrival. Arrival date of the guest for the reservation.
Departure. Departure date scheduled for the reservation.
Status. Status of the current reservation.
Begin Date/End Date. The Begin Date and the End Date define the range of dates when the locator is applicable.
From Time/To Time. The From Time and the To Time define the time period when the locator is applicable.
Entered By. The user ID of the OPERA user who created the locator.
Entered On. The date when the locator was created.
Locator Text. The text of the locator.
If there are multiple locators listed in the grid, you can click on a column header to sort grid entries based on the information in that column.
New. Select to create a new locator for the guest.
Edit. Select to edit the highlighted locator for the guest.
Delete. Select to delete the highlighted locator.
Close. Select to close out of the locator functionality.
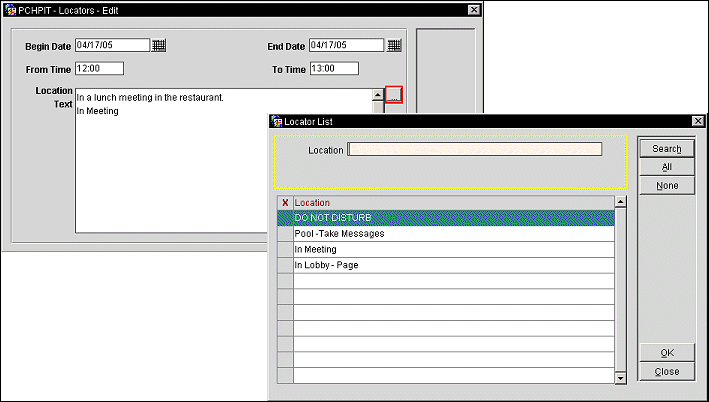
From the Locators screen, select the New button to create a new locator, or highlight the locator you want to change and select the Edit button. The New/Edit Locators screen appears.

Provide the following information on this screen:
Begin Date/End Date. Use the calendar tool or manually type in a Begin Date and an End Date to define the range of dates when the locator is to be applicable. The Begin Date cannot be in the past. The To Date cannot be earlier than the Begin Date. The default for both dates is the business date.
From Time/To Time. Enter a From Time and a To Time to define the time period when the locator is to be applicable. (Times are local times as defined by the time zone set for the property in Configuration>Property>Property Details.) The From Time cannot be in the past. The To Time must be later than the From Time. The time entered will automatically be converted, based on the time format setting in the Configuration>Property>Property Details. For example, if the property is set up for 12 hour time, then if a 15 is entered, it would automatically be converted to 3pm.
Location Text. Enter the locator instructions in this text entry area. The description associated with the locator when it is configured (System Configuration> General>Locations) appears in this field by default. The default text can be edited or replaced as necessary.
Locations. Select the ellipsis button to display and select a location from this list you want to set up for this guest.
Note: Depending on your business needs, a reservation alert can be another option for notifying the Front Desk staff of special guest requests or needs. Alert messages can be set up to appear as pop-up screens when you access the guest's reservation, when you check the guest in, or when you check the guest out.
See Also